
Before I start this, can we all just take a moment out of our day to admire how adorable my pup is? I just love him!

Ok, now that that's out of the way, here's the beaut I have to show you today!

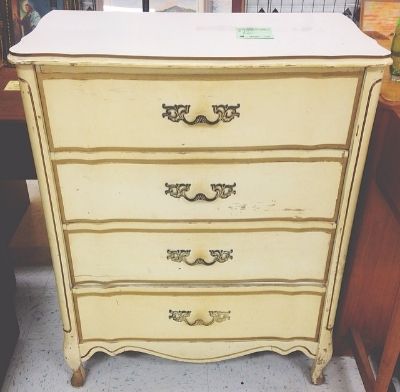
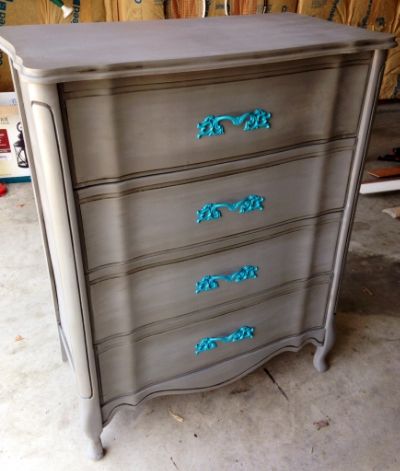
One day last winter I was walking through Goodwill when this caught my eye. Although it came with a few gifts - living will papers, an ancient teddy bear, and a few other goodies - I had to have it. All creepy things aside, it really is a fabulous dresser. After I bought it I learned that it is called a "French Provincial Chest of Drawers" and it sells on places like Etsy for like $300+! Crazy (and awesome for them)!
Here's the before...
This was really one of the easiest projects I've ever done. I took the handles off, did a little sanding, and began painting. I used...
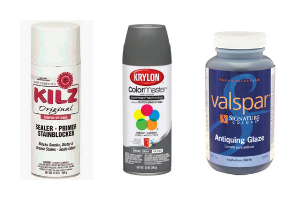
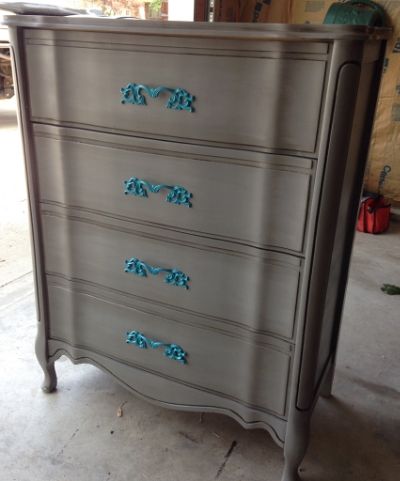
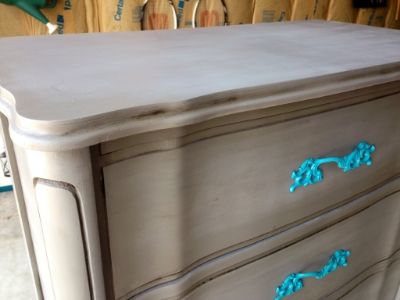
KILZ primer is my absolute favorite. I primer everything. It really is important for the durability of your furniture. After I primed it and let it dry, I did some very light sanding. and I spray painted it all grey. After I did 2 or 3 coats of grey (once it was solid), it was time for the glaze. Once again, a simple wipe on, wipe off method. You do little sections at a time by brushing it on and wiping it off with a rag. Lastly, I spray painted the handles a teal color to make it pop! I am also aware that the handles are on upside down from the way it was originally. I like it better this way :)
I would say the entire project took 4 or so hours, so it wasn't bad at all! Now the next step is to figure out where I want it! Unfortunately it's just sitting in my unfinished spare bedroom that is still full of boxes from moving.
Between working 6 days a week, and starting up school again in October, I really hope I will have time to keep doing all of my home projects. It really is what helps me relax sometimes! It's my "me" time. Like I said earlier, the next project is the kitchen table - it's almost finished actually, so that will be the next post.
So what do you think? Hopefully I explained it will enough. It was such a simple project that I didn't even think to take pictures during the process.
Until next time!
-Kellie
No comments:
Post a Comment